
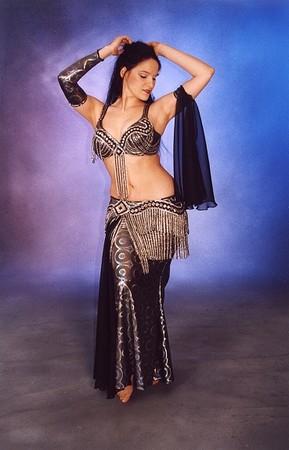
Sleeves & gauntlets
Nicely decorated arms look beautiful. You can wear bracelets, hand and arm jewelry. Sleeves make you look more 'dressed'.
Die am einfachsten zu nähende Variante für einen Armschmuck ist ein enger langer Stoffärmel.
Hierzu nimmt man am besten einen in eine Richtung elastischen Stoff wie Pannesamt oder Lycra (praktischerweise ein Rest vom Rock), den man querelastisch verarbeiten muss. Benutzt man einen nicht elastischen Stoff, sollte man unten einen kurzen Reißverschluß einarbeiten, damit auch der Handrücken hindurch paßt.
Für den Schnitt genötigt man den Handgelenkumfang, den Oberarmumfang und die Armlänge. Rundherum Nahtzugabe nicht vergessen. Seitennaht schließen, unten den Stoff umnähen, oben einen Tunnel nähen, Gummiband einziehen, fertig.
Wer mag, kann sich die Stulpen auch mit einer Spitze über dem Handrücken nähen, an der eine Fingerschlaufe befestigt wird. Dazu muß der Schnitt noch um ein ca. 10 cm hohes Dreieck erweitert werden.
Man kann auch Fransen an der Seitennaht annähen. Dabei aufpassen: Perlfransen machen die Stulpen schwer und sie können rutschen.
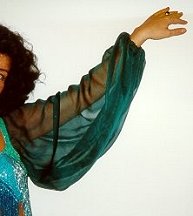


The dark green chiffon sleeves are fixed to the straps and the edge of the bra so that the top has a kind of blouse character.
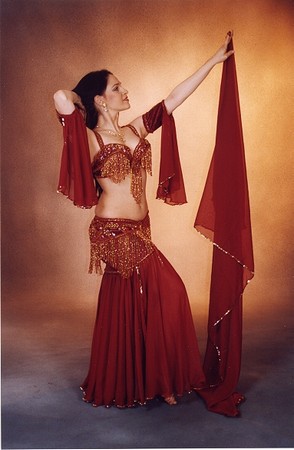
The wide red sleeves consist of chiffon and are fixed with elastic strings on top and bottom.
Transparent and non-transparent sleeves have a different effect.
It is nice to have sleeves of the same color as the skirt. Sometimes you can use the material left from sewing the skirt.
Very noble are sleeve-bands with embroidery: Cut a piece of molton and cotton of suitable width, cover it and start embroidering, sew the sleeve on and close it with velcro tape or a big snap fastener.
Sleeves with wings made of chiffon
Fotos: Sha-Ri , thanks a lot for this chapter and the paintings!
During the past few years, wing sleves with different forms of chiffon established as a beautiful innovation concerning arm embellishments.
There are different variants; generally they consist of a cuff around the upper arm and a chiffon part.
The cuff can be worked as a small band or up to a broad upper arm band with stitchings, the chiffon part as circle, half circle, quarter circle or one or more corners or what ever you like or looks nice.
Please take into consideration that, if you have very long chiffon sleeves during dancing with a veil, you can easily wind yourself up in the veil.
And: Embellishing the chiffon with a stitched beading seam makes the sleeves quite heavy. During spinning they can start having "a life on their own" (and the dancer might slap herself with the sleeve into her face, which is not very elegant!)
A small cuff can e. g. be worked like a bra strap, for a wide one a one-direction elastic material is used and worked across the grain. A rectangle (upper arm circumference * desired height of the cuff plus seam allowance) is cut out of the material. On the upper end a tunnel is sewn and an elastic rubber band is put in the tunnel. Alternatively you can make a closure with velcro or snap-fasteners.
The chiffon part:
The sleeves get very voluminous when they are worked out of a full circle, but according to this lots of chiffon has to be used. A half circle is enough to already look really good.
If you only have small chiffon remnants (e. g. from cutting a circular skirt), you can also use those and sew the sleeves out of two or three quarter circles.
The chiffon is now cut in quarter/half/full circles (please do not forget the cutout for the upper arm) and then hemmed with a narrow zig-zag stitch. After that the chiffon is sewn inside out onto the cuff. (The joint is almost invisible if sewn by hand.)
Here you can either sew the chiffon completely around the cuff or leave a part of it (maybe a quarter) open or even sew only half of it.
Just find out for yourself which is easiest for you to "handle", since those sleeves shall embellish the dancer and must not develop a disturbing life of their own.

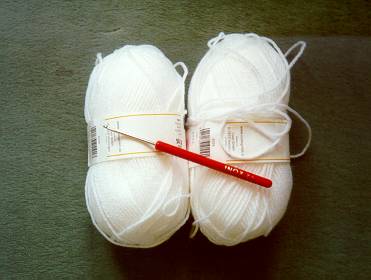
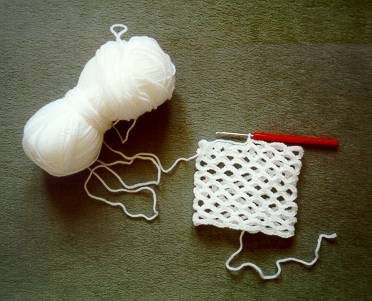
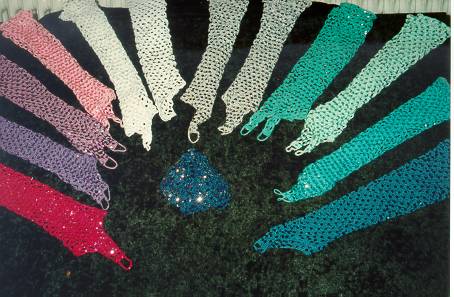
Instruction for Crochet gauntlets

Crochet gauntlets have become very popular and they are really easy to make: get yarn of a suitable color for hook thickness 2.5 - 3.5. Sometimes you find glitter yarn (scratchy like wire pot cleaners). Cheap acryl yarn is very popular for this purpose.
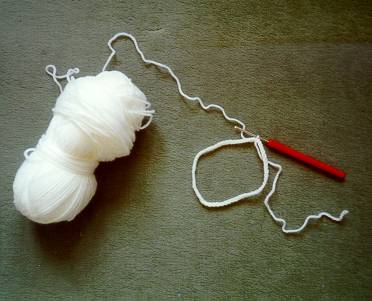
First crochet enough chain stitches so that you can close a ring around your upper arm. Then you may add a round of slip stitches for the elastic string - I leave it out, as it simply made my gauntlets too tight.
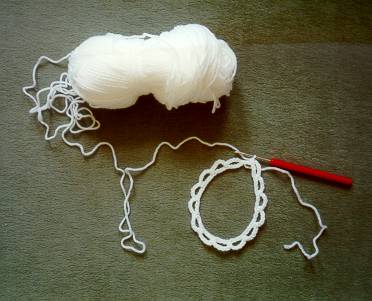
Now crochet chain stitch arches, each made of 5 stitches and one slip stitch etc. When you close the circle, you place the slip stitch in the middle stitch of the previous chain stitch arch.
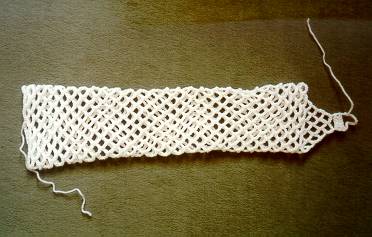
Crochet circle after circle until you feel the gauntlet is long enough (try it on!). Then follows the part for the back of the hand: after one slip stitch, turn around (perhaps with "connecting" stitches to get to the middle of the first arch), 5 chain stitch arches, turn around, 4 chain stitch arches etc. until 1 arch is left. Crochet 5-7 treble stitches on top, plus a loop of 10-15 chain stitches for the middle finger (like for an oven cloth) and there you have the first gauntlet.
What is a "connecting stitch"? Pierce through, yarn around and pull through both loops on the hook at the same time, don't yarn around a second time. (I hope you understand ;-) !)
You can sew sequins on the gauntlets, but I have never tried it myself, as I was afraid the gauntlet might get too tight.
I glue the sequins, that works quite well. There is special water-soluble textile glue. It is white and becomes transparent once it is dry. As far as I know it is the same as glue for wood.
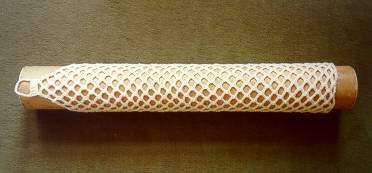
I take a cardboard roll (for mailing posters) or a similar round long object to pull the gauntlet over.
Sheritra has left a very good hint in my guest book:
For gauntlets, I simply sewed the leg of net leggings of a matching color to a bracelet. As I could not find any cardboard roll as you described for gluing on the sequins, I simply bought a grey plastic water pipe type 70HT in a property market.
Then I did not have to remove the gauntlet so soon before it would start sticking to the pipe. When the glue was almost dry, the gauntlet could easily be removed.
Thanks!
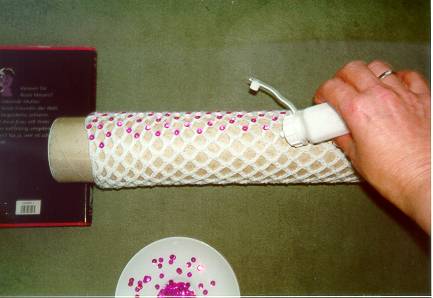
I place little glue drops on the crossing points (and perhaps in between) and a sequin on each of them. You can easily make 40 - 60 glue drops at the same time and then place the sequins on top. Here is a hint: take a match that dipped several times into hot wax. Sequins will stick to the cold wax drop. Spread the sequins on the table and pick them up with the match to place it on the glue.
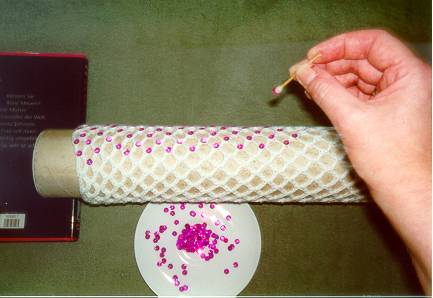
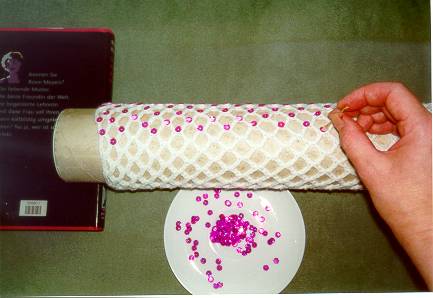
After some sequins, remove glue from the wax drop on the back of your hand. From time to time you have to renew the wax drop.
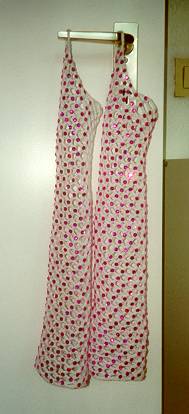
Now let it dry for some time, carefully release the gauntlet from the roll by a knitting needle, pull it off and hang it (on a door handle) for final drying.
Then you pull an elastic string thought the top, best by means of a crocheting hook (thin elastic strings are available in various colors).
Copyright © 2000-2012 by Nadya - All rights reserved.
Last modified: